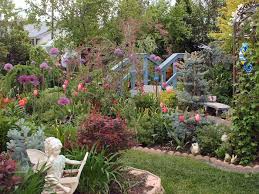
The fairies are there but they won't stay unless you make it inviting. You can make their wishes come true and spend quality time engaging with your children (or the neighbor's or community's) by building a fairy garden together, filled with their dreams. In the process, they learn about gardening and the beauty of nature.
Draw a plan on paper with your child's input. Ask your child what shape he or she would like (or simply tell your child the shape if your garden space is limited). Using this shape, map out the sorts of things your fairy garden will contain. See ideas under "Tips".
Take a walk in the garden and plot out the area that will make the fairy garden. It should be somewhere child-friendly and less accessible to dogs, puppies and cats who might mess with it. Fence it off with small garden fences if necessary (little blunt wooden picket fences are cute).
Dig over the garden. Do this together with your child, so that the soil is ready for planting and is easy to place the faerie pieces into. Fertilize if necessary.
Place a square or circle paver upon which the main feature piece will sit. A terracotta coloured cement paver is ideal. Place a statue on this square or circle, such as a mushroom, faerie, animal or other feature item that the child has chosen.
Mark out a larger outer fairy circle which surrounds this feature piece. Plant a circle of flowers chosen by the child around the inner circle. Edge this outer circle with upright border blocks (the wavy ones are the most elegant).
Make little fairy circles next to the large circle. Use river stones, pebbles etc. Place plants inside these circles, or little trinkets chosen by the child. You could also make other shapes with the pebbles, such as cat faces, dogs, triangles, diamonds etc.; imagination is the only limit.

Fairy Garden
Draw a plan on paper with your child's input. Ask your child what shape he or she would like (or simply tell your child the shape if your garden space is limited). Using this shape, map out the sorts of things your fairy garden will contain. See ideas under "Tips".
Take a walk in the garden and plot out the area that will make the fairy garden. It should be somewhere child-friendly and less accessible to dogs, puppies and cats who might mess with it. Fence it off with small garden fences if necessary (little blunt wooden picket fences are cute).
Dig over the garden. Do this together with your child, so that the soil is ready for planting and is easy to place the faerie pieces into. Fertilize if necessary.
Place a square or circle paver upon which the main feature piece will sit. A terracotta coloured cement paver is ideal. Place a statue on this square or circle, such as a mushroom, faerie, animal or other feature item that the child has chosen.
Mark out a larger outer fairy circle which surrounds this feature piece. Plant a circle of flowers chosen by the child around the inner circle. Edge this outer circle with upright border blocks (the wavy ones are the most elegant).
Make little fairy circles next to the large circle. Use river stones, pebbles etc. Place plants inside these circles, or little trinkets chosen by the child. You could also make other shapes with the pebbles, such as cat faces, dogs, triangles, diamonds etc.; imagination is the only limit.
Fairy Garden
Add extra fairy pieces. A fairy table and chairs can be made from various sizes of pavers. Purchase a small child's tea-set from a dollar store and place on the table for the fairies to have tea.
Follow your child's imagination to include other items in the garden. Listen to their ideas and try to adapt to them with items on hand.
Remind your child to keep the flowers watered regularly. While watering, they can check for faeries. Encourage them to leave little gifts for the fairies (small pieces of fruit, seeds, whatever they like). This will ease the transition from stubborn disinterest in gardening to enjoying it!
Have a special tea party to open the fairy garden. Invite other family members, friends and neighbors over to marvel at the little garden and to provide the child with encouragement to tend it.
